How to: Building a Cold Frame
It took a bit longer than I expected, but our cold frames are complete. I wrote about our idea for collapsable cold frames two months ago, with the overly optimistic notion that it would be a weekend project and I would quickly be posting an update. Making the frames has been a weekend project, but between everything else going on it has been a couple hours a weekend for 2 months instead of just one weekend – but they are finally done.
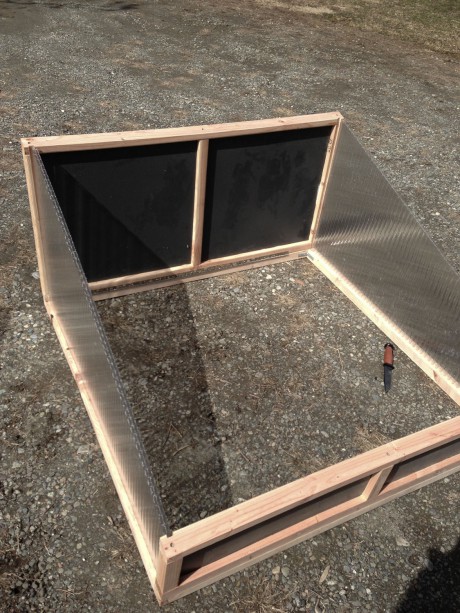
The idea was to create cold frames that could be easily folded up and stored during the winter months, and that were modular enough that they could easily be linked together to make a single long continuous cold frame. The design has a single square frame on the bottom and hinged front and back panels that fold down flat. The sides are clear polycarbonate panels that slip into slots in the front, rear, and bottom frames. The top frame has corrugated polycarbonate attached and slips over the front and rear panels locking everything into place. Here is a brief description of how we made it.
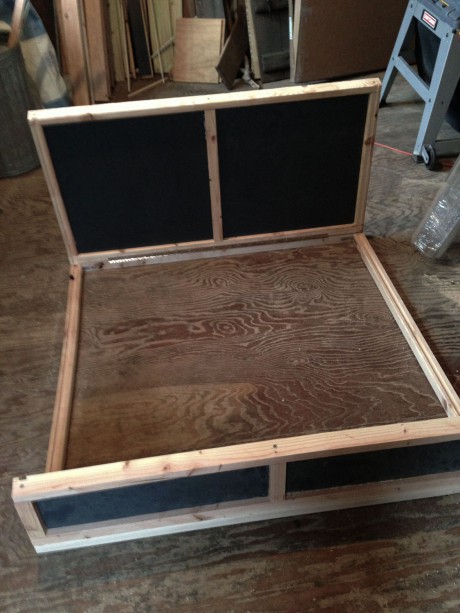
The sides are opaque, simple frames infilled by 1/4″ plywood. The frames are made from Douglas Fir 2x4s that we ripped on the table saw to 2x2s. The front frame is 6″ tall and the rear is 2′, the frames are all 4′ wide to get the most efficient use of materials and to fit on our 4′ wide raised beds.
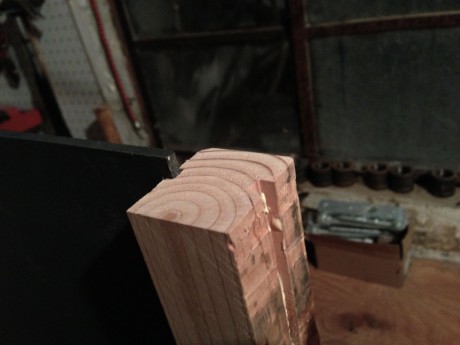
In order to tightly fit the infill panels we routed all the inside edges of the frame, a quick 1/4″ wide cut to accept the 1/4″ ply. Fortunately we have a router table with a fence that allows us to easily route the length of the boards consistently, the only challenge being the slight warp in some of the boards.
We cut the panels with our table saw from a single 4×8′ sheet, another benefit of keeping the frames 4′ wide. Single plywood doesn’t weather well, so we painted these with exterior house paint.
We screwed the frames together with some Scorpion deck screws (I love the self tapping screws for this kind of work) and glued the panels into the slots. We temporarily glued the top piece of the frame, holding off on screwing it together until we built the bottom frame and measured everything.
The 4′ square bottom frame is made out of the same 2x2s, the two sides routed with a 5/8″ slot to accept the polycarbonate side panels. We placed the front and rear panels in place and measured the slope of the top, marking it on the edge of the front and rear panels. We ran the panels through the table saw, trimming them at an angle so the top panel will fit snugly. These weren’t screwed in to the top pieces previously so that we could run them through the saw, but once the cutting was done we screwed them into place. Finally, we routed the inside edges of the front and rear panels with a 5/8″ slot, the same as the bottom frame, to accept the polycarbonate side panels.
The front and rear panels are attached to the bottom frame with a piano hinge. The hinge runs along the inside edge so the panels fold inward, making them naturally tend to lean towards the inside and helping to hold the side panels in place. Also, the inside hinges allow the panels to fold inward compactly.
The last bit of woodwork was the top frame. This time it was roughly 4′-2 1/4″ instead of 4′ to account for the angle, but taking into account the thickness of the wood (1 3/4″) we were able to make the top frames out of two 2x4s with little waste. The top frame, like the bottom, is held together with metal angle brackets at the corners. The angles slices we cut off the top edges of the front and rear panels were flipped and attached to the front and rear edges of the top frame, both along the high-side edges. These act as a simple lip that holds the top frame into place, preventing it from sliding down.
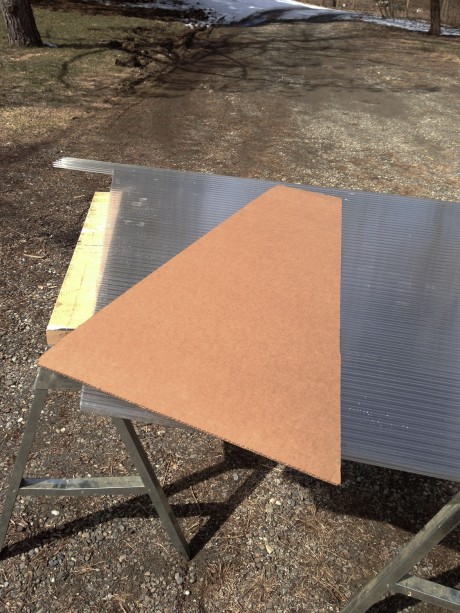
For the polycarbonate sides we first made a template out of cardboard, testing the sizing in situ before making any cuts. Using the template as a guide we cut the polycarbonate side panels with a jigsaw, notching each bottom corner so the panels would fit tightly.
We tested out the side panels and did a little bit of hand trimming to fit as there was a little variation based on the slight warp in the boards. Each panel and corresponding frame edge is marked with a permanent marker so we can keep track of which piece fits where.
Finally we cut the corrugated polycarbonate for the tops, again with a jigsaw but no need for a cardboard template since they were simple cuts. The polycarbonate roofing panels come with plastic spacers matching the corrugated profile so it is easy to get a tight fit along the front and rear edge of the frame. The panels and spacers are tacked down with basic drywall screws.
The frames are all ready to go and I’m hoping to try them out on an early run of Arugula soon. The only remaining step is that we may try treating them with some mineral oil. It’s not for outside use as it evaporates quickly, but it is the only food grade oil and since this will be sitting in close proximity to our food we are wary of any toxic chemicals or varnishes. If the oil doesn’t work, the worst scenario is that I end up building more frames in 4 or 5 years.


